Select your language
")
")
- Details
- Category: Tech articles
-
By James A. Langbridge
- Hits: 15
Introduction to RTT
As embedded developers, we have all been there—debugging by serial. Now, of course, it isn't really debugging; it's more like reading whatever the program wants to say. You don't get to go deep down, but if your program has a line saying printf("Hello, world!\r\n");, then with a bit of luck, opening a terminal shows a hello world output.
Manufacturers have been helping us for years. Take any Nucleo board. It has a debugging side; you plug it into USB, and it powers the board, but it is also a debugger and, as a bonus, generally a virtual COM port. And to be fair, this works well. On Nucleo boards, this is connected to the debugger straight from a UART port. On some other boards, there might be an FTDI header, just connect an FTDI UART cable, and you are good to go.
There are downsides to this.
First of all, physical. The hardware team needs to route at least two wires to part of the board (often not right next to the microcontroller itself). Besides, those two pins could have been the difference between a smaller design.
Next, programming. Writing data via printf impacts the system, especially if you are using a low-speed setting like 9600. There are some ways around that, like using DMA, but again, you might prefer to use that DMA channel for something else.
Another subject is security. What happens when your device is ready for production? Will it still output debug messages saying that it has received data, and once decrypted, that data becomes this? Not a good idea. You could just close the UART port, but if you don't remove the printf commands, the impacts remain.
Enter SEGGER RTT, short for Real Time Transfer. This is comprised of a trio of tools; the RTT library to be placed on the target, software to be put on your development computers (Windows, MacOS or Linux), and the connection between the two, a JLink probe. The library and the software are free, but a JLink probe itself can cost a bit of money, but if you are serious about embedded development, I highly recommend them, they do so more than just print text, and I hope to showcase that a little more as we continue.
Besides, you might already have a JLink at home. The following demonstration is made on a Nucleo-F207ZG board. It comes equipped with an STLink V2 on board, but there is a tool on SEGGER's website that allows you to download a J-Link firmware onto an STLink V2 (the Nucleo board, not the debugger). It's perfectly safe, and even ST has a video on that subject somewhere on YouTube. However, you won't get support from either SEGGER or ST, but in the years that I've been using them, I've never had a problem. If for some reason that doesn't work out for you, you can always reflash an STLink firmware using the same tool.
So I have a Nucleo-F207ZG with the debugger reflashed as a J-Link. I wrote a basic program, one that blinks an LED, that can turn an LED on or off depending on an input, and a push button. All of this data is then sent via RTT to the J-Link, and viewed on SEGGER's software, called J-Link RTT Viewer. This is the output:
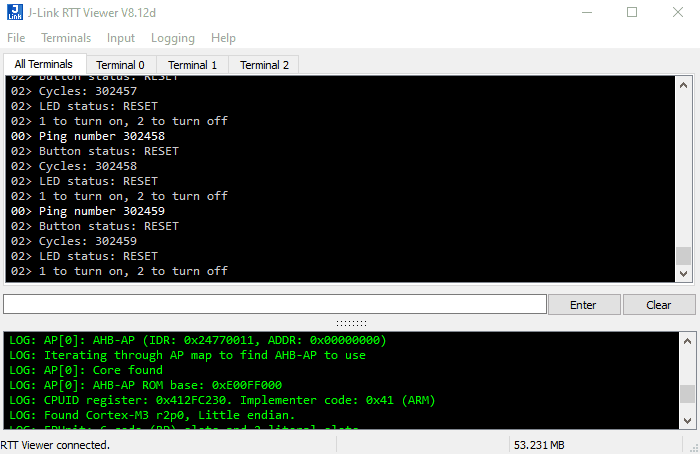
At first glance, it is nothing exceptional. I do indeed have all of the output that I expect from my target, and it is difficult to read. However, notice the tabs; Terminal 0 to Terminal 2. Let's take a closer look.
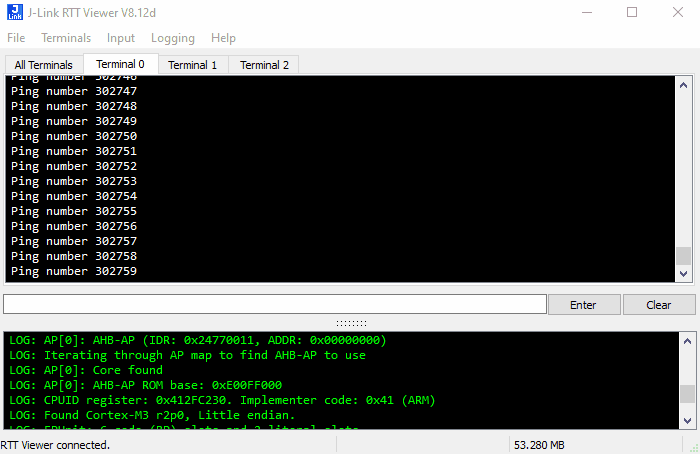
This is the output from Terminal 0. Every time the LED blinks, I send a message, calling it a "ping". This happily increments, but if the system is reset for any reason, the contents of the terminal are deleted - I consider this data to be "instant only", as soon as the system resets, it no longer has any value.
Next, terminal 1:

Terminal 1 is a little different, it shows when the user pressed a button, and show the "ping" number that corresponds. It was originally empty, but contrary to Terminal 0, I want this data to remain. In the event of a reset, the contents of this terminal remain. Now, on to Terminal 2:
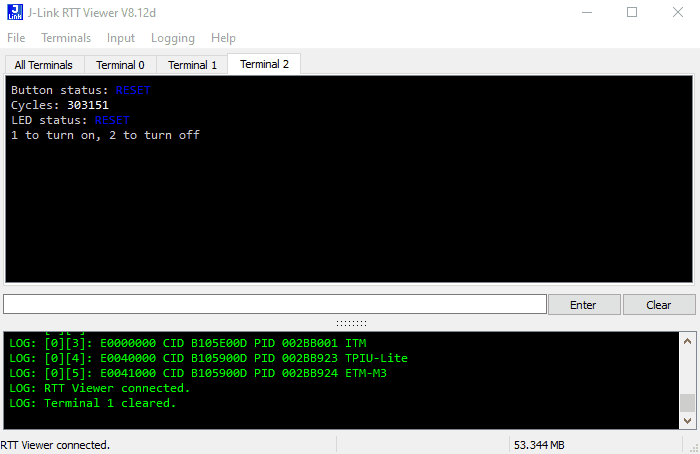
Terminal 2 is different. It presents itself like a console, displaying almost real time data on the system without scrolling. It lists the status of two LEDs, and the current "ping" counter. It also displays a message, inviting us to press 1 to turn on an LED, and 2 to turn it off. RTT Viewer also has the ability to capture data, and send it from the host to the target. If we press on 1, an LED does indeed turn on. Also, note the use of color.
All of this is done without a UART. Technically, RTT sets up a small space in memory with a specific header, and the J-Link will scan the target's memory until it finds it. Once it does, it looks at the buffers, and begins transferring data extremely quickly. As we are using a converted STLink V2, it will be slower, but faster J-Links will, of course, yield better results. A J-Link Plus can, according to SEGGER's website, transfer 256 bytes in 1.02ms, and the faster J-Link Ultra+ can perform the same operation in close to 500 microseconds. We'll be testing speed a little bit later.
In the next article, I'll talk about setting up RTT, and I'll show you just how quick it can be. It can be put in place at the beginning of a project, but just as easily be put in place in the middle of ongoing work.